Kling 4.0 Guide: From First Prompt to Final Review
Kling 4.0 guide to choosing inputs, planning keyframes, writing prompts, reviewing audio and fixing failed shots—with a complete example workflow.
A useful first video has a clear action and an ending you can recognize. “Make a cinematic product film” leaves both decisions open. “A hand places a ceramic cup beside a window, steam rises, and the camera stops on the cup” gives you a shot you can plan, generate and judge.
This Kling 4.0 guide follows that second approach. It explains the official model’s published workflow, then turns it into a practical shot plan. The prompts, review checklists and example retry limits below are editorial recommendations, not claims from a completed benchmark.
Availability matters: Kling’s September 30 announcement describes Kling 4.0 early access and a wider October rollout. Check the model selected in your own interface. On this site, the general generator’s current option labelled “Kling 4.0” routes to Seedance 2 Mini; it does not offer the full official workflow described here. The dedicated Motion Control tool uses the actual Kling 2.6 motion-transfer endpoint.
1. Decide what the shot must deliver
Write a one-sentence brief before opening the settings. Include the subject, its action, the audience and the final composition. Then write a separate acceptance condition: what must remain correct for the clip to be usable?
For a ceramic-cup reveal, the brief might be: “A calm vertical product shot for a short social video, ending with the handle visible on the right.” The acceptance condition might be: “The cup keeps its shape, the hand releases it naturally and the last frame has room for a caption.” Neither statement requires a particular camera model, lens brand or string of quality adjectives.
Keep your first attempt small. One subject, one main action and one camera move make the result easier to evaluate. Once that shot works, you can add complexity deliberately. Starting with a crowded scene means an unsuccessful output tells you very little about which part of the request failed.
| Question | Useful answer | What it changes |
|---|---|---|
| Who is this for? | A customer seeing the product for the first time | The product must be readable early |
| What happens? | A hand places the cup and leaves | One continuous action |
| What must stay fixed? | Cup shape, handle and color | Reference selection and review |
| Where will it appear? | A vertical social placement | Framing and caption space |
| How does it end? | Cup alone, camera still | Final composition and edit point |
For choosing a project by profession or audience, use the companion Kling 4.0 use-case guide. A production brief is easier to write when you know which part of the job you want the model to perform.
2. Match the input mode to the material you have
Text is appropriate when the appearance is still open to exploration. An image is better when you have already approved the composition or character design. Reference assets help describe recurring subjects and visual details. Keyframes define important visual states along a scene.
Do not treat these as interchangeable uploads. A picture of a character tells the model something different from a frame showing where that character should stand at the end of the shot. Label the role of every asset in your planning notes, even if the interface uses different names.
| Your starting material | Suggested workflow | First thing to check |
|---|---|---|
| A written idea | Text-led generation | Does the basic staging communicate the idea? |
| An approved still | Image-led generation | Does the initial composition survive movement? |
| A recurring character or object | Reference-led creation | Are distinguishing features consistent? |
| Several planned visual moments | Multiple keyframes, where available | Are the transitions physically and visually plausible? |
| A performance you want to reuse | Dedicated motion transfer | Is the action readable in the reference video? |
A reference-driven project may also suit O3. The Kling O3 vs Kling 4.0 comparison explains how to choose based on the scene rather than the version number. You do not need to rebuild an effective reference library simply because another model has appeared.
3. Prepare a small, coherent asset set
Choose assets that agree with each other. If one image has a short sleeve and another has a long sleeve, the model has to reconcile an appearance change you may not have intended. The same applies to product shape, camera height, room geometry and the direction of light.
For a character, collect a clear view of the face, an angle relevant to the planned movement and a framing reference. For an object, prioritize the features that make it identifiable: handle position, surface pattern, outline and relative proportions. More files are not automatically more useful. A contradictory reference can create more uncertainty than an absent one.
Before uploading, inspect the following:
- The subject is large enough to identify without zooming deeply into the file.
- Important body parts or product features are not cut off.
- The references do not contain unwanted captions, watermarks or background objects.
- Lighting and clothing are sufficiently consistent for the intended scene.
- You have permission to use the assets and any recognizable person’s likeness.
Keep a copy of the approved inputs. If you later change the references, give the new group a version name. Otherwise, two prompts with the same wording may appear to behave differently because their underlying assets changed.
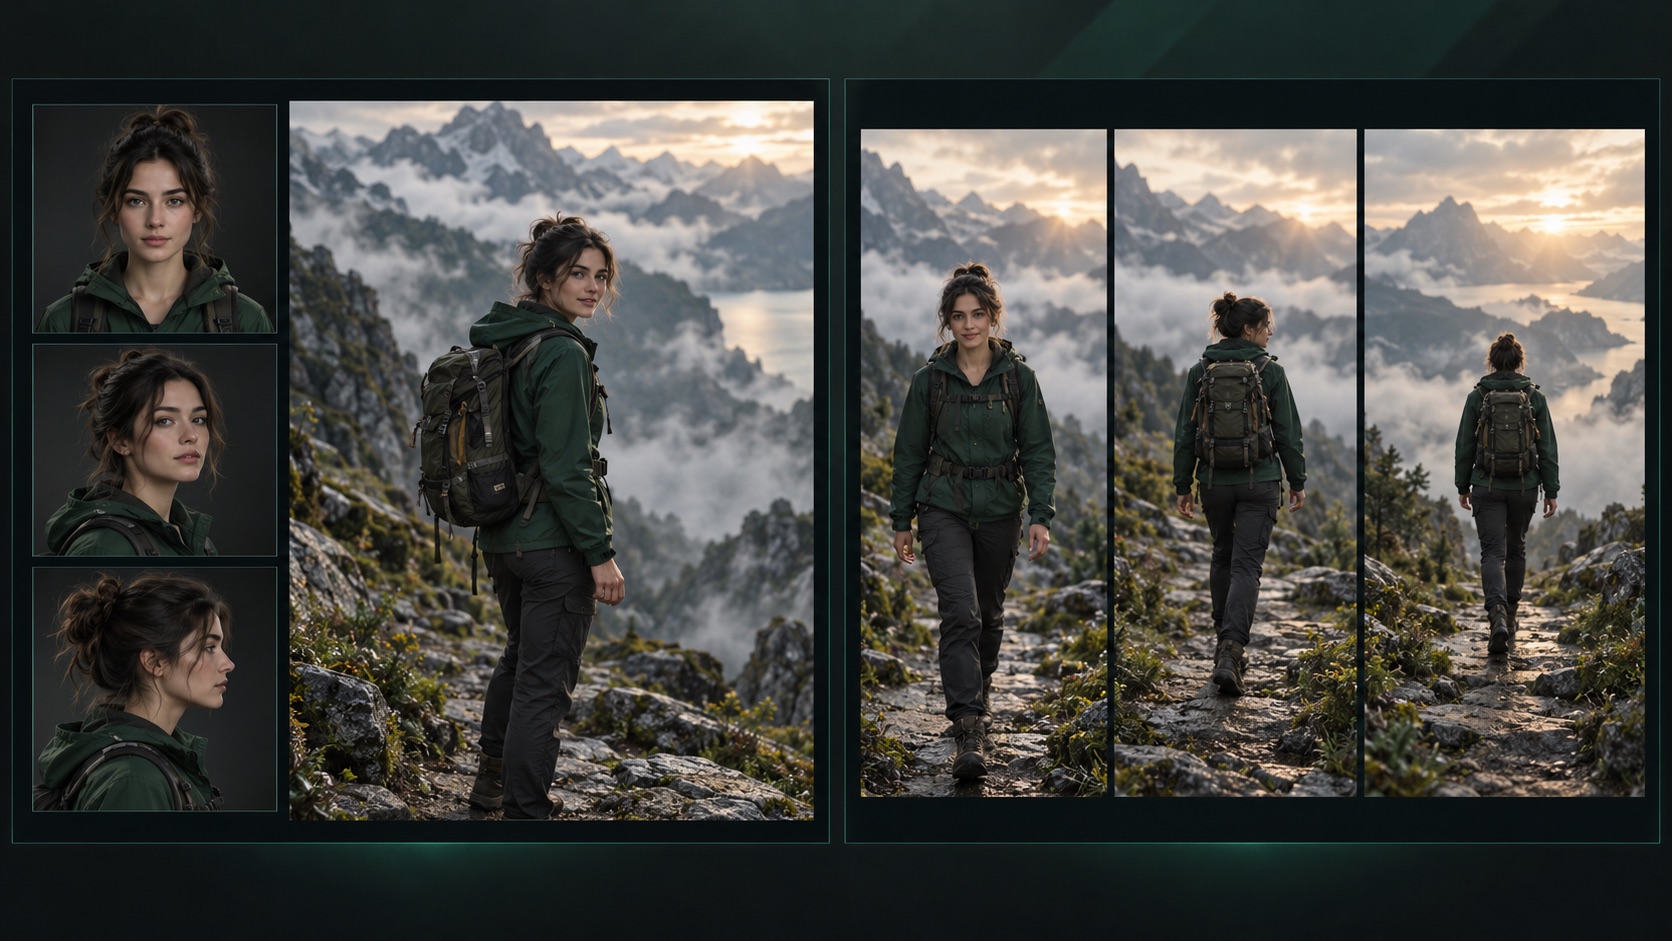
Reference planning and visual milestones
- Reference assets: establish the subject
- Visual milestones: plan the change
AI editorial illustration, not a Kling generation. A planning illustration, not a quality comparison between the models.
4. Write the prompt as a shot instruction
Use five labels: Subject, Action, Camera, Scene, Finish. The labels are a planning aid, not a required API syntax. Their purpose is to stop one important part of the scene from disappearing into a long list of style words.
Subject: A cream ceramic cup with one curved handle.
Action: A hand places the cup on a wooden table and withdraws.
Camera: A slow, small push toward the cup; no cut.
Scene: Soft morning window light, quiet room, restrained colors.
Finish: The cup stands still with its handle visible on the right.
Each line answers a different question. The subject identifies what matters. The action describes a visible event. The camera sets one movement. The scene controls the environment. The finish defines the point at which the shot has succeeded.
Avoid instructions that fight one another. “Static camera” and “orbit around the cup” cannot both describe the same uninterrupted camera behavior. “Keep the product unchanged” conflicts with a later request to reshape it. When you need two different compositions, plan two shots or use the available multi-shot controls rather than hoping a comma will resolve the contradiction.
Use concrete verbs: place, turn, open, lift, pause. “Epic,” “premium” and “cinematic” can describe taste, but they do not specify movement. Add aesthetic language after the physical event is understandable.
5. Plan keyframes as visual milestones
The published Kling 4.0 Multiple Keyframes guide describes up to ten keyframe images. That is a capacity, not a requirement to use ten. A simple scene may need only a clear opening, an important change and a clear ending.
For the cup example, sketch three milestones:
- The empty table is visible and the hand approaches with the cup.
- The cup touches the table; the hand still holds it.
- The hand has left and the cup is still.
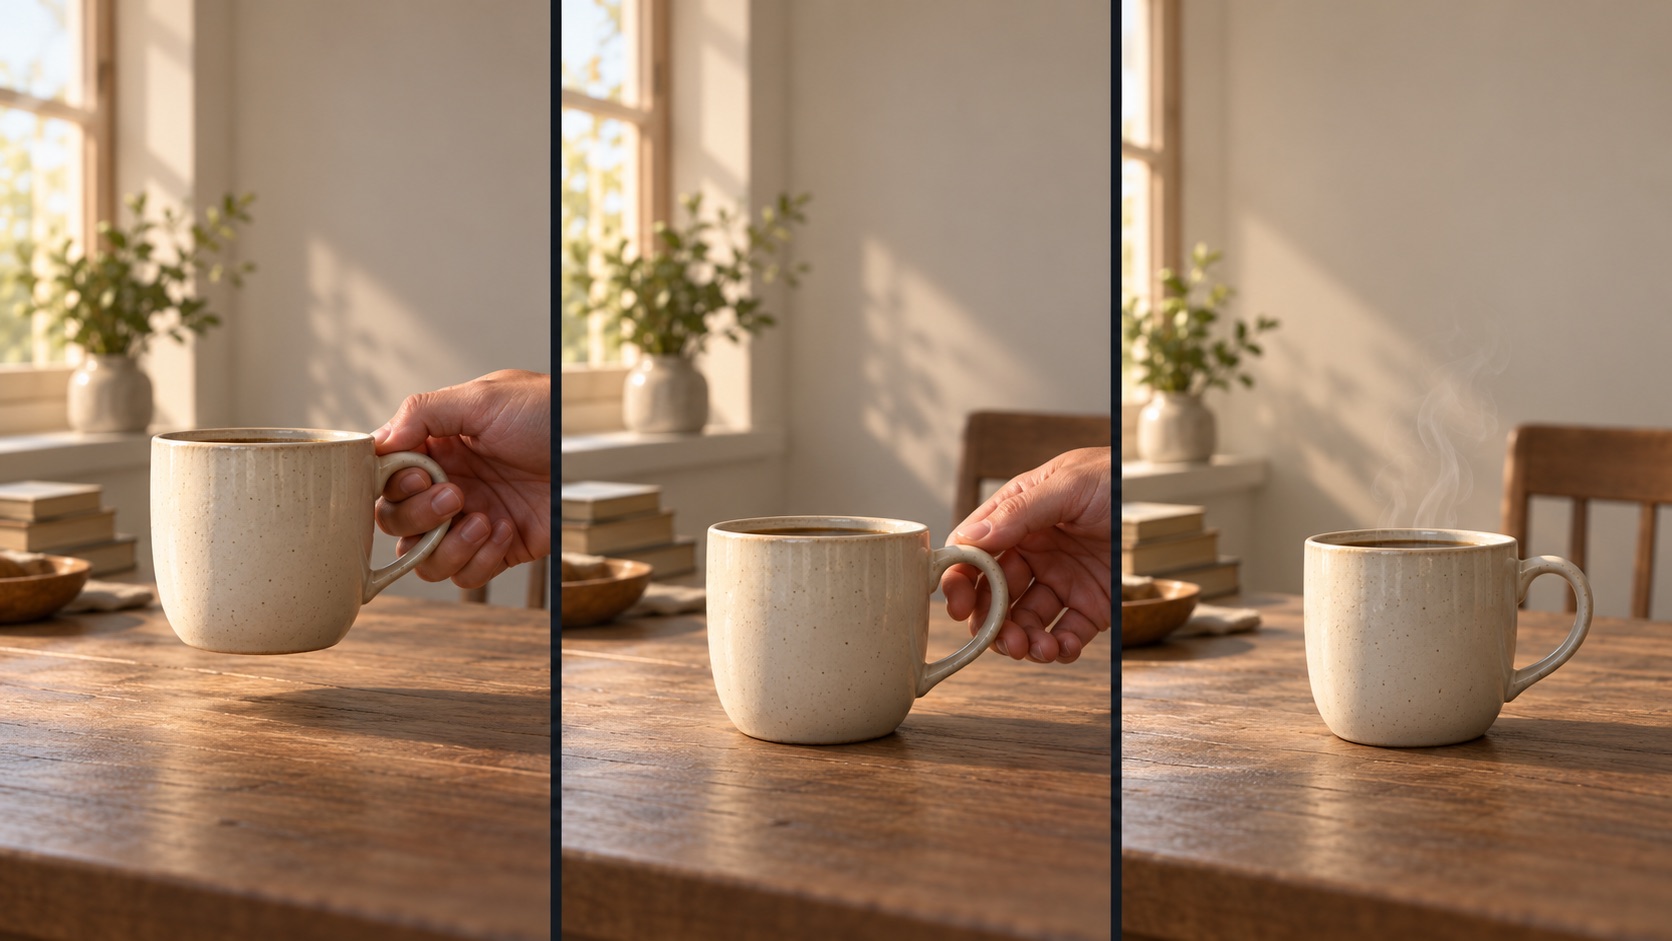
Turn one action into three reviewable frames
- 01 · Opening: approach the table
- 02 · Action: set down and release
- 03 · Ending: the cup stands alone
AI editorial illustration, not a Kling generation. Review continuity in cup shape, handle direction, lighting and camera position.
The transitions between these frames must make sense. If the handle jumps from one side to the other without a turn, the model must invent an explanation. If the first frame is a wide room view and the second is an extreme close-up, decide whether you want a cut or continuous movement. A keyframe is a state; the prompt still needs to describe how the scene gets there.
Do not assume that adding a timestamp creates an exact editing guarantee. Inspect the actual result and leave room to trim. For delivery that demands frame-accurate timing, complete the assembly in an editor after accepting the generated material.
6. Choose duration and resolution for the test
The official 4.0 announcement describes native clips up to 30 seconds. Use the shortest available duration that communicates your action before moving to a longer scene. A longer clip is valuable when continuity matters; it also creates more frames in which identity, props and motion can drift.
Resolution should follow the delivery requirements and the controls your selected endpoint actually exposes. A sharp frame cannot fix a wrong gesture or a disappearing handle. Check composition and motion first, then decide whether a higher-resolution version is justified.
Do not copy numbers from a release announcement into an unrelated generator. The current general generator on this site exposes different limits because it uses a different upstream model. Its present “Kling 4.0” option offers 480p/720p, 4–15 seconds and at most three reference images in the interface. Those are local product controls, not the official model’s specification.
For a first layout test in the general generator, a five-second 480p clip is a reasonable starting suggestion if it fits the brief. Read the displayed credit quote before submitting. Do not interpret that suggestion as a minimum official Kling setting or a quality recommendation established by testing.
7. Build one complete example
Here is a proposed eight-second cup-reveal plan for an interface that supports the required controls. It is a planning example, not a generated result.
| Part | Planned event | Review question |
|---|---|---|
| Opening | Cup and hand approach the table | Is the cup already identifiable? |
| Main action | Cup is placed, hand withdraws | Does contact with the table look plausible? |
| Landing | Camera settles on the cup | Is there a usable ending for the edit? |
Subject: A plain cream ceramic cup with a single curved handle.
Action: An adult hand gently places the cup on a wooden table,
releases the handle, and leaves the frame. Light steam rises.
Camera: One slow forward move that settles as the hand leaves.
Scene: A quiet room with soft morning light from a window on the left.
Finish: The cup remains motionless, handle on the right, with clear
space above it for a caption that will be added during editing.
Keep the on-screen caption out of the generation request for this exercise. Adding it later makes wording, typography and placement easier to control. If accurate product text is a delivery requirement, compare it letter by letter against the original before accepting a generated version.
Save the prompt with the input filenames, selected model, mode, duration, resolution and task ID. These notes are what make a later retry understandable. Without them, it is easy to compare different configurations and call the difference a model effect.
8. Treat audio as another track to review
Where the selected model and interface support native audio, specify what should be heard: a short line, a pause, a room tone or a single event. For multiple speakers, make it clear which character speaks each line and when the other character stays silent.
Keep the first dialogue test short. Listen without watching to check intelligibility and pacing, then watch with sound to check the mouth movement and speaker assignment. An attractive visual does not compensate for a mispronounced product name or the wrong person speaking.
The Motion Control tool on this site does not expose a dialogue-generation control. Do not use a scene prompt as a promise that it will synthesize a requested voice. If speech matters to the final deliverable, choose a workflow with the required audio controls or add an approved voice track during editing.
9. Diagnose the failure before paying for another version
Change one important variable per revision. That makes the next output a useful experiment rather than another unrelated attempt.
| Symptom | First thing to inspect | Next change to try |
|---|---|---|
| Face changes during a turn | Missing side view, occlusion, incompatible references | Use a clearer relevant angle or reduce the turn |
| Hands merge or disappear | Speed, overlaps and contact with props | Simplify the gesture or separate it into another shot |
| Camera barely moves | Conflicting camera instructions | Keep one move and give it a visible endpoint |
| Product shape changes | Ambiguous silhouette or conflicting pictures | Use a clean view with the key feature visible |
| Long scene loses continuity | Too many events without a clear transition | Shorten the segment or define fewer milestones |
| Dialogue feels rushed | Too much speech for the available time | Shorten the line and leave a pause |
| Job appears stuck | Network state versus server task state | Refresh the existing task before submitting again |
Do not automatically blame resolution. Many failures concern the meaning or geometry of the request. Increasing pixel count while keeping contradictory instructions only makes a more detailed version of the same problem.
10. Review and hand off the accepted clip
Watch once for the story, once for visual continuity and once for sound. Scrub through the action’s hardest moment and the final transition. Check the beginning and ending after placing the clip on your actual editing timeline, because a flaw may become obvious only beside neighboring shots.
Track cost per accepted clip. Include rejected generations, editing time and any additional sound work. A useful planning example is to allow three candidate versions before revisiting the brief; that is a team decision, not a model limit or a recommended spend for everyone.
Export with enough information for the next person: accepted file, source assets, prompt version, model identifier and notes on edits still required. If an output is only a concept preview, label it accordingly so it is not mistaken for approved product footage.
Frequently asked questions
Can I follow this guide with only a text prompt?
You can use the brief, prompt structure and review method without references. Steps that depend on image inputs or multiple keyframes require an interface that actually supports those features. Start with a single shot rather than inventing reference controls that are not present.
Should I use every available keyframe slot?
Use the number needed to define meaningful changes. Extra near-duplicate frames can make your plan harder to manage without adding a new instruction. The opening, main event and ending are a useful first outline.
How is motion control different from image-to-video?
Image-to-video starts with a still and generates motion from the prompt and model. Dedicated motion control adds a video that supplies the performance. Use the Motion Control tool when the movement itself is your main reference.
Is this a review of measured Kling 4.0 quality?
No. It is a workflow guide based on published capabilities and editorial production advice. It does not claim a measured success rate, generation time or quality advantage over another model.
What should I make first?
Choose one short action with a clear end frame: a cup placed on a table, a fictional character waving or a quiet landscape reveal. The use-case guide helps turn that exercise into a project relevant to your work.
Published capability references, checked October 6, 2026: Kling 4.0 announcement, Multiple Keyframes guide and Kling VIDEO 3.0 Omni user guide. Cover artwork is an editorial illustration, not a Kling-generated video frame.

Turn your brief into a video
Start with text or a reference image. Choose an available model, duration and aspect ratio in the studio, and review the credits before submitting.